Basic Audio Manager in Godot 4 – Tutorial
Creating a seamless audio experience in your game with a basic audio manager can significantly enhance player immersion. Techniques like fade-ins, fade-outs, and crossfades for background music transitions are essential for achieving this smooth auditory experience. In this tutorial, I will guide you through setting up a basic audio manager in Godot 4 that handles these transitions efficiently. By the end, you’ll have a robust system capable of managing your game’s music effortlessly.
For demonstration purposes, we will create a small 2D scene where a player can walk from one music area to another. The audio manager will handle transitions from no music to a music area and from one music area to another. It will also support stacking music areas, allowing you to specify a music area within another music area.
Dear reader, please consider supporting my game ❤
Setting Up the Scene for the Basic Audio Manager in Godot 4
- Create a new project and call it, for example, “BasicAudioManager”.
- Create a new Node2D scene.
- Call it “Main”.
- Create a Camera2D
- Then a CharacterBody2D and call it “Player”.
- Click “Add Script” and choose the “Basic Movement” template.

- Add a CollisionShape2D and in the Inspector a RectangleShape2D to “shape”.
- Then click the root node and add a StaticBody2D.
- Add to that node again a CollisionShape2D and a RectangleShape2D.
- Also add Sprite2Ds to the Player and the StaticBody2D.
- Get some assets, for example the free and great assets over at kenney.nl.
- Stitch together a little scene, so that it looks something like that (just an example):
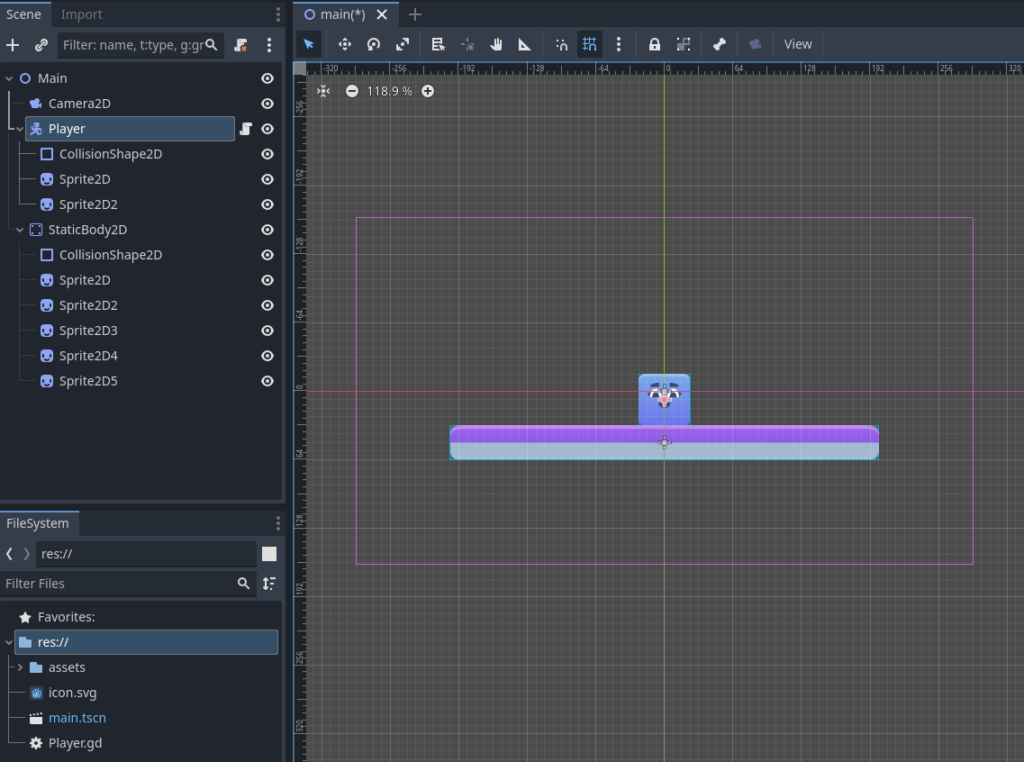
If you now run the scene, you should already be able to move from left to right with the arrow keys:
Create the Audio Manager
- For the Audio Manager, we will create a global scene.
- Right-click on the FileSystem and create a “New Scene”.
- We are going to use a Node as root.
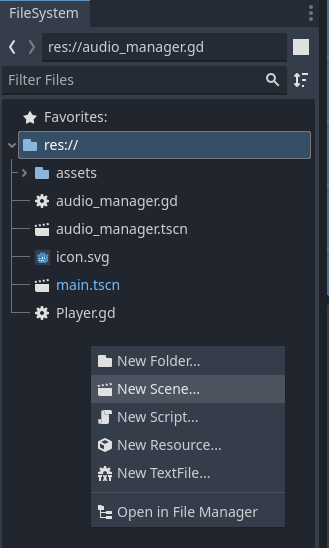

- Call it “audio_manager”.
- Next, add a script to the node.
- Then go to Project > Project Settings > Autoload.
- Choose the audio_manager scene and add it to the list:

- This makes it a global scene, that can be accessed from everywhere in your game.
- It may not be totally necessary for this small tutorial game, but usually in a real game this solution often will be more convenient.
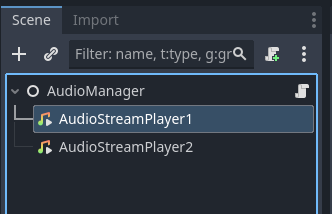
- We then add two AudioStreamPlayers to the AudioManager scene.
- The reason for this is, so that we can crossfade between two songs.
- Save everything and the final audio manager should look something like that:
The Audio Manager Script
For the audio manager script, we are going to add some functions, that will handle the transitions. But first, add the following variables to the script:
extends Node

const mute_db := -80.0 # To mute the audio player
const default_music_db := 0.0 # This is for normal volume
const fade_time := 2.0 # The time it takes to fade in/out in seconds

var current_music_player : AudioStreamPlayer # the current player

@onready var audio_stream_01 : AudioStreamPlayer = $AudioStreamPlayer1
@onready var audio_stream_02 : AudioStreamPlayer = $AudioStreamPlayer2

func _ready() -> void:
	current_music_player = audio_stream_01
Fade-In Music
First, let’s add the fade-in function.
func fade_music_in(track: AudioStream) -> void:
	current_music_player.stream = track # Specify the song
	current_music_player.volume_db = mute_db # Mute the player
	current_music_player.play() # Start playing
	# Use tweens for transition:
	var tween = create_tween().set_ease(Tween.EASE_OUT).set_trans(Tween.TRANS_EXPO)
	tween.tween_property(current_music_player, "volume_db", default_music_db, fade_time)
The tween transition type should mitigate the fact, that from -80.0 dB to let’s say -30.0 dB there is not much in terms of volume change, compared to -30.0 dB to 0.0 dB, due to how volume works in Godot. For more information on tweens, check out my other tutorial. But this type is just a suggestion. You can play around with the types, to see what fits best for you. You can also check out my tween cheat sheet over at itch.io, to help you find the right type:
Fade-Out music
Next, we add a function, that fades out the currently playing music:
func fade_music_out() -> void:
	var tween = create_tween().set_ease(Tween.EASE_IN).set_trans(Tween.TRANS_SINE)
	tween.tween_property(current_music_player, "volume_db", mute_db, fade_time)
Change Music Track
Lastly, we are going to add a function, that changes the music track. For that, it fades the currently playing audio player out, and simultaneously the other audio player with the new track in:
func crossfade_music_to(track: AudioStream) -> void:
	fade_music_out() # Fade out first player

	# Switch current Player:
	current_music_player = audio_stream_01 if current_music_player == audio_stream_02 else audio_stream_02

	fade_music_in(track) # Fade in second player
Also, to demonstrate the audio manager, we need some audio files. I quickly searched over at opengameart.org for 3 audio files and found some from an author called Spring, which will do the trick.
Changes to the Player
Before we continue, please make two small changes to the player script, so that it looks like the following:
extends CharacterBody2D
class_name Player # Add a class name

const SPEED = 100.0
const JUMP_VELOCITY = -400.0

var music_area_array : Array[MusicArea] = [] # add array to stack all entered music areas

# Get the gravity from the project settings to be synced with RigidBody nodes.
var gravity = ProjectSettings.get_setting("physics/2d/default_gravity")


func _physics_process(delta):
	# Add the gravity.
	if not is_on_floor():
		velocity.y += gravity * delta

	# Handle jump.
	if Input.is_action_just_pressed("ui_accept") and is_on_floor():
		velocity.y = JUMP_VELOCITY

	# Get the input direction and handle the movement/deceleration.
	# As good practice, you should replace UI actions with custom gameplay actions.
	var direction = Input.get_axis("ui_left", "ui_right")
	if direction:
		velocity.x = direction * SPEED
	else:
		velocity.x = move_toward(velocity.x, 0, SPEED)

	move_and_slide()
Most of it should already be there from the template anyway. Please add the class name and the music area array (the class MusicArea will be added next) and you can also lower the speed to 100.0, so that you have a little bit more control.
Music Areas
Next, we want to create and add music areas to tell the manager, when and what music it should currently be playing.
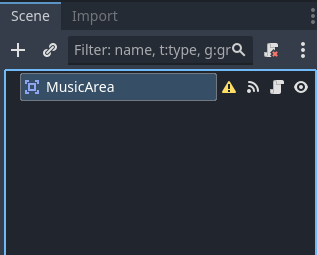
- Create a new scene with the root node as an Area2D and call it “MusicArea”.
- Add a script to it.
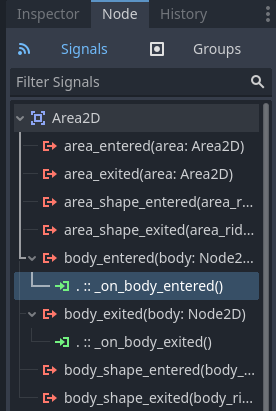
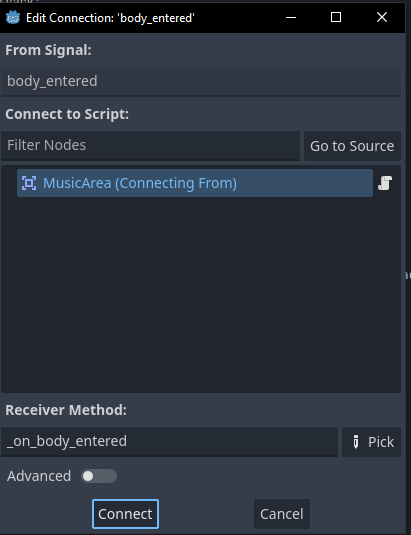
- Next click the MusicArea and in Node > Signals connect the
body_enteredandbody_exitedsignal to the script. For more information on how signals work, check out this tutorial.
- Change the script to the following:
extends Area2D
class_name MusicArea # class name

@export var track : AudioStream # the track that should be played in this area

func _on_body_entered(body: Node2D) -> void:
	if body is Player: # when the player enteres the area
		if body.music_area_array.is_empty(): # No music is currently playing
			if track:
				AudioManager.fade_music_in(track)
		else: # some music is already playing
			if track:
				AudioManager.crossfade_music_to(track)

		body.music_area_array.append(self)

func _on_body_exited(body: Node2D) -> void:
	if body is Player: # when the player exits the area
		body.music_area_array.erase(self)

		if !body.music_area_array.is_empty(): # music was stacked
			var last_track : AudioStream = body.music_area_array[-1].track
			if last_track:
				AudioManager.crossfade_music_to(last_track)
		else: # no music stacked
			AudioManager.fade_music_out()
Basically, we keep an array with all the music areas on the player and stack new areas when entered. When exited, we remove that music area and play the last area’s track, if there is any. Otherwise, we just fade out the music.
- So to test all of that, we open the main scene again and in there we add, for example, 5 MusicAreas.
- Add a CollisionShape2D to every area and a RectangleShape2D to every shape of it.
- Then add different music tracks to the MusicAreas and arrange everything like in the screenshot below (just my example):
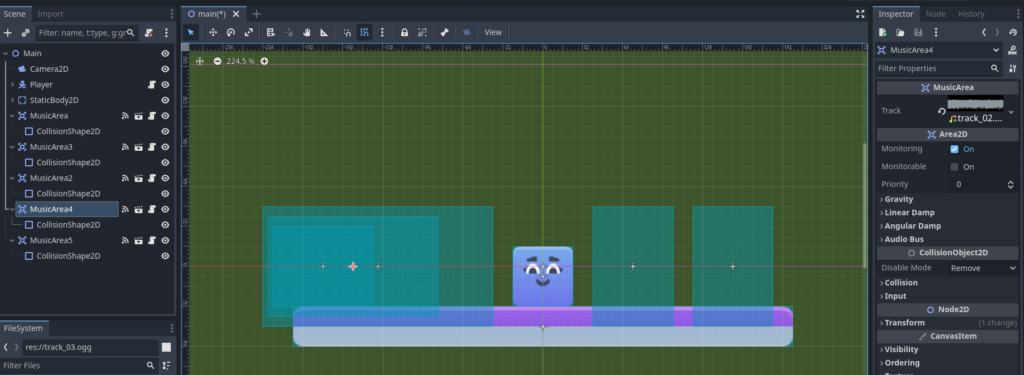
When everything is implemented, it should work like that:
That is the Basic Audio Manager in Godot 4
Congratulations! You’ve successfully set up a basic audio manager in Godot 4 capable of handling smooth music transitions through fade-ins, fade-outs, and crossfades. This little tool will enhance the auditory experience in your game, making it more immersive and engaging for players. Continue experimenting with the audio manager and explore additional features to further refine your game’s audio system. Happy game developing!
Download the source files
If already subscribed, you can find all project files here. Otherwise, you can subscribe to the mailing list to get access to this and other project files for free and get notified, when a new tutorial is posted.


