Composition in Godot 4 – Tutorial
In this tutorial, we will explore the concept of composition in Godot 4. Composition is a core principle in game development, involving the creation of complex game objects by combining simpler, reusable components. Understanding composition can greatly assist you in organizing your game’s codebase, promoting reusability, and maintaining flexibility in your development process, ultimately saving you time during game development.
While composition and inheritance are often presented as mutually exclusive choices, in practice, a mixed approach can be highly effective. If you’re interested in learning more about inheritance, you can check out this tutorial (maybe after finishing this one). This tutorial will guide you through the principles of composition in Godot 4, covering nodes, scenes, scripting, and how these elements work together to create complex, modular game objects.
Dear reader, please consider supporting my game ❤
Understanding Composition in Godot 4
Composition is a design principle that involves creating complex objects by combining simpler, reusable components. Using components has the following advantages:
- Reusability: Components can be reused across different parts of the game.
- Modularity: Components are independent, allowing you to mix and match them as needed.
- Flexibility: Components can be easily replaced or extended without affecting the rest of the system.
- Consistency: Changes to a component automatically apply to all objects that use it, ensuring uniform behavior across your game.
Getting started – Create the Level
For this tutorial, we will create a little 2D project, where we showcase the use of components. I will use assets from kenney.nl for it.
- Create a new project and in it a new 2D Scene.
- Call it “CompositionTut” for example.
- Add a Camera2D and set the zoom to 3.
- Next, add a TileMapLayer to draw a little level, like the following:
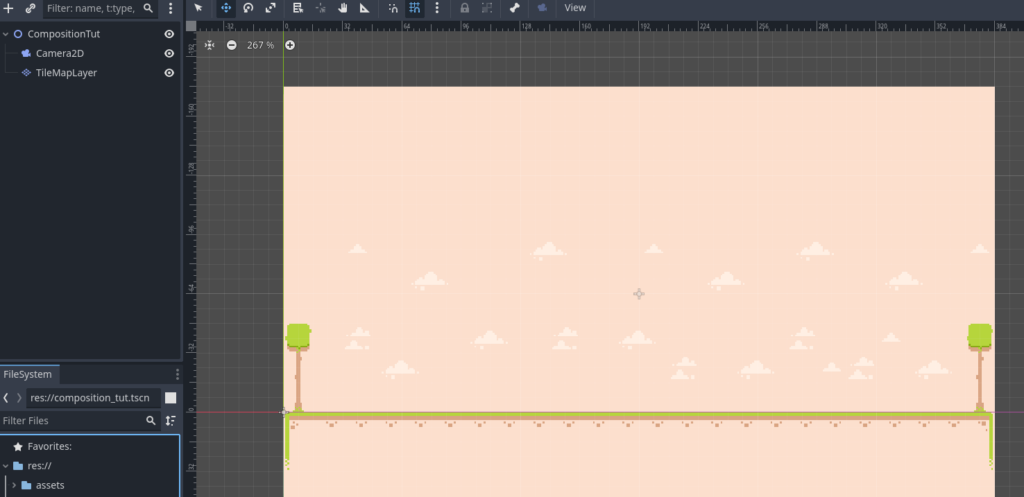
- Make the level however you like. For my example, I used the tilemap from the Kenney pack.
- I will not go into detail here, so if you are unsure about how TileMaps in Godot work, please check out my tutorial on the subject (be aware, that the old TileMap is deprecated, but it is very similar to the new TileMapLayer).
- In short, create a new TileSet for the TileMapLayer.
- In Physics Layer add a new item and leave layer and mask as it is.
- Also, change the Filter under Texture to “Nearest”.
- Drag Kenneys tilemap into your TileSet.
- Next, select the tiles, that should have collision (in our case the floor tiles and the trees) and draw the collision accordingly.
- Then, use the TileMap to draw your level. All ground tiles should have collision. Place trees with collision on the edges, to prevent the player from falling off.


Create the Components
We will create two types of components. The first will be a Movement Component, that handles the movement of the animals. It will be just a simple script, that extends Node. The other will be a Sprite Component, that will handle the sprite animations.
Movement Component
- Right click in the FileSystem and click on Create New > Script.
- Call it “movement_comp” and create it.


- In the script, change the code to the following:
extends Node
class_name MovementComp

@export var character_body : CharacterBody2D # For assigning a Character Body
@export_range(-1.0, 1.0, 2.0) var dir := 1.0 # Set the movement direction on start
@export_range(500.0, 2000.0, 100.0) var speed := 1000.0 # Set movement speed

func _physics_process(delta: float) -> void:
	if character_body: # Only move, if a character body is assigned
		character_body.velocity.x = speed * delta * dir # set the velocity of the character body
		character_body.move_and_slide() # move and slide the character body

		if character_body.is_on_wall(): # if character body hits a wall, change direction
			dir *= -1.0
Sprite Component
- Create a new Sprite2D scene.
- Call it “SpriteComp” and save it.
- Add a script to it with attach new script.
- In the script, write the following:
extends Sprite2D
class_name SpriteComp

@export var character_body : CharacterBody2D # assign a character body
@export var anim_frame_amount := 0 # the amount of frames the animation takes according to the tilemap

var count := 0.0 # a counter for counting the time passed

@onready var frame_default := frame # set the default frame

func _process(delta: float) -> void:
	if character_body: # only go here if character body is assigned
		if character_body.velocity.x < 0.0: # if character body is moving left, flip the sprite
			flip_h = true
		elif character_body.velocity.x > 0.0:# if character body is moving right, don't flip the sprite
			flip_h = false

		if abs(character_body.velocity.x) > 0.0: # if character body is moving, animate it
			count += delta # count up
			if count >= 0.1: # after 100 ms switch the frame
				count = 0.0
				frame += 1
				if frame > frame_default + anim_frame_amount: # reset frame, after the last frame is reached
					frame = frame_default
		else:
frame = frame_default # reset frame, if character body stands still- After that, go to the Inspector, set the tilemap from Kenney as Texture.
- Set Hframes to 10 and Vframes to 6.
- Also, change the Filter under Texture to “Nearest”.

Player Character
Next up is the player character. We will use just the template movement code for this example.
- Create a new scene with CharacterBody2D as root.
- Call it “Player”.
- Add a CollisionShape2D and under Shape a RectangleShape2D.
- Save the scene and add a script to the Player node.
- When asked, choose the Basic Movement Template.

- In the script, make some adjustments, so that it looks like the following:
extends CharacterBody2D
class_name Player # give the class a name

const SPEED = 100.0 # change the speed
const JUMP_VELOCITY = -200.0 # change the jump velocity


func _physics_process(delta: float) -> void:
	# Add the gravity.
	if not is_on_floor():
		velocity += get_gravity() * delta

	# Handle jump.
	if Input.is_action_just_pressed("ui_accept") and is_on_floor():
		velocity.y = JUMP_VELOCITY

	# Get the input direction and handle the movement/deceleration.
	# As good practice, you should replace UI actions with custom gameplay actions.
	var direction := Input.get_axis("ui_left", "ui_right")
	if direction:
		velocity.x = direction * SPEED
	else:
		velocity.x = move_toward(velocity.x, 0, SPEED)

move_and_slide()- Next we will add the first component.
- Click on the button next to the Plus sign above the Player called Instantiate Child Scene.
- Search for “SpriteComp.tscn”.
- Add it to the node tree.
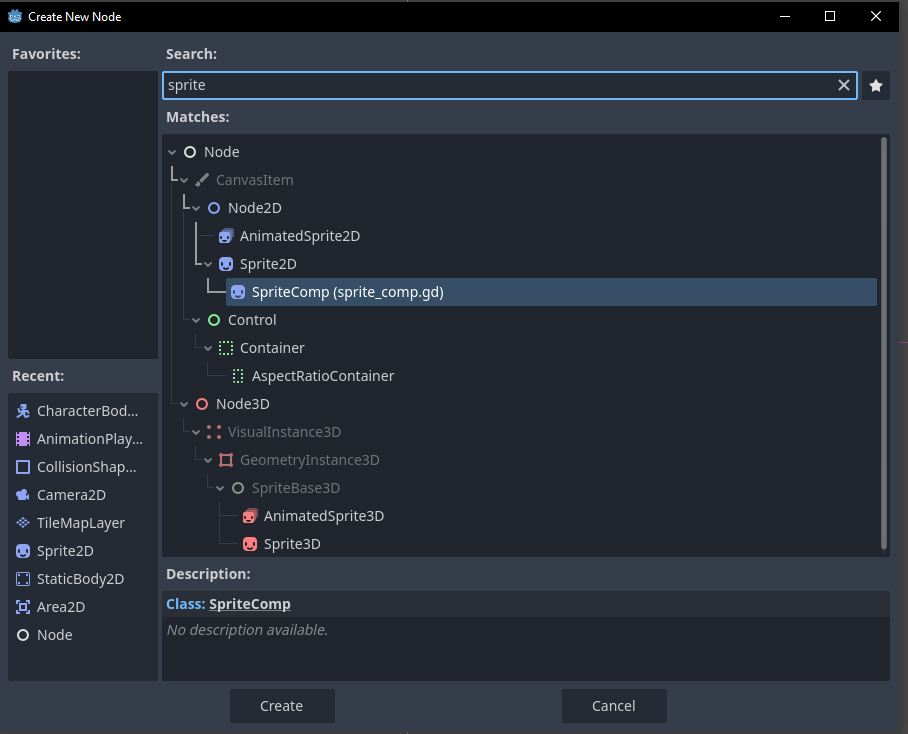
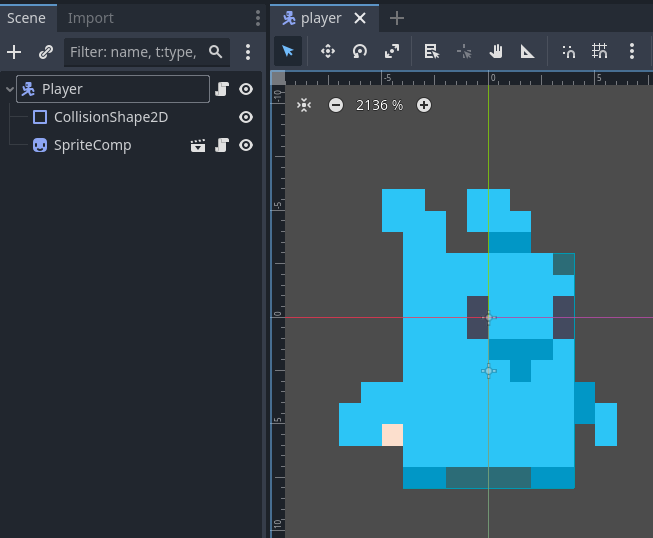
- Now, click on the SpriteComp and in the Inspector for Character Body, click assign and choose the Player node.
- Also, set the Anim Frame Amount to 1, since it is only a 2 frames animation in our example.
- And don’t forget to set the first Frame correctly, which is 45 in our case.
- Finally, resize the collision shape accordingly.
Bee Animal
The first animal will be a bee.
- Create a new CharacterBody2D node and call it “Bee”.
- Add a CollisionShape2D and a RectangleShape2D to it.
- Now we add again the Sprite Component, same as with the player.
- Set it up accordingly, so assign the Bee as Character Body, Anim Frame Amount is again 1, the starting Frame is 51.
- The next component, that we add, is the Movement Component.
- Go to the Plus sign and search for it.
- When adding it, a new Node will appear in the tree.
- In the Inspector assign the Character Body, set the Direction and the Speed.
- Finally, resize the collision shape.

Obstacle
Now we make a little obstacle, for the player to jump over.
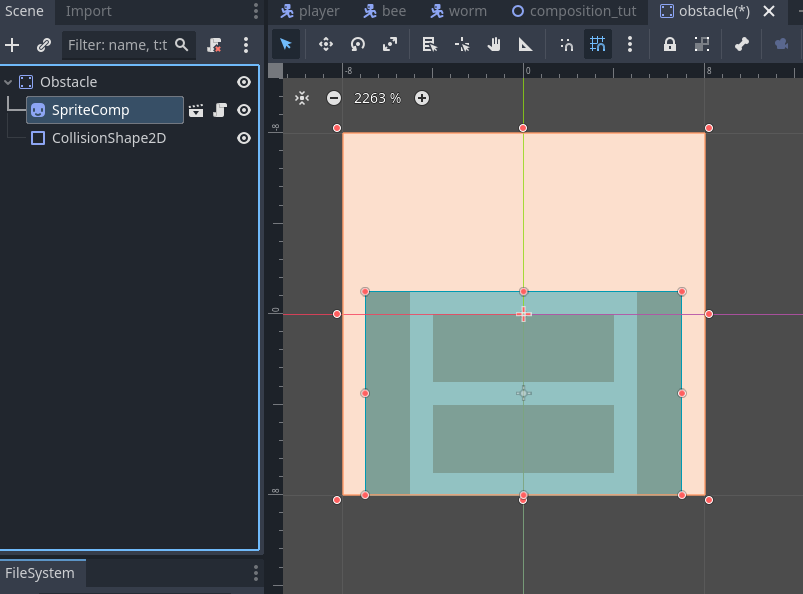
- Create a new StaticBody2D and call it “Obstacle”.
- Add a CollisionShape2D and a RectangleShape2D to that.
- Add only the Sprite Component scene, but don’t assign the Character Body.
- Leave also the Anim Frame Amount at 0.
- Just change the Frame under Animation to 36 to get the crate image.
- And resize the collision shape correctly.
Worm Animal
Let us create one more animal to showcase the components.
- Like before, create a new CharacterBody2D, and call it “Worm”.
- Add the collision shape to it.
- Add both components to it and hook them up accordingly.
- This time, the start Frame in the SpriteComp is 55.
- in the MovementComp we set Dir to -1 and maybe make the Speed a little slower.
- Again, resize the collision shape.

Just to clarify the difference between our two components here: The Sprite Component is actually a scene, which means that if you change that base scene, the component will change too (If you did not overwrite it beforehand). This is useful in our case because we can add the TileMap to the base SpriteComp scene and also set the Hframes and Vframes there. Every time you add this scene component, those values will be the default values.
For the Movement Component, we use our custom class, so when it’s added to a new object, the created MovementComp will always start with the default values set in the class. Thus it basically behaves like all the other nodes. Depending on the use case, one approach may be more useful than the other.
Wrapping up
Let us quickly set the collision layers and masks for the different objects, so that their collisions make sense. If you want to know more about collision layers and masks, feel free to check out my tutorial on it.
- First, let us rename the layers, so that there is no confusion.
- 1 is main, 2 is player and 3 is animal.
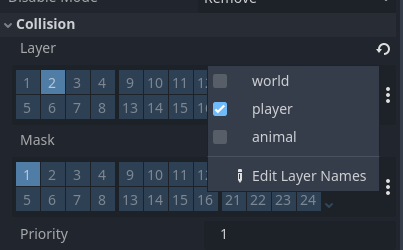
- Then for the Player, we set layer “player” and mask “world”.
- So, the player only collides with the world.
- For the Bee, we set layer “animal” and mask “world” and “animal”.
- This way they collide with the world and with other animals.
- For the Worm it is the same as for the bee.
- And for the Obstacle, we set layer “world” and mask “world”.
- Note, that it is the same for the TileMapLayer in the main scene.
Lastly we want to place our objects in our level (however you like):
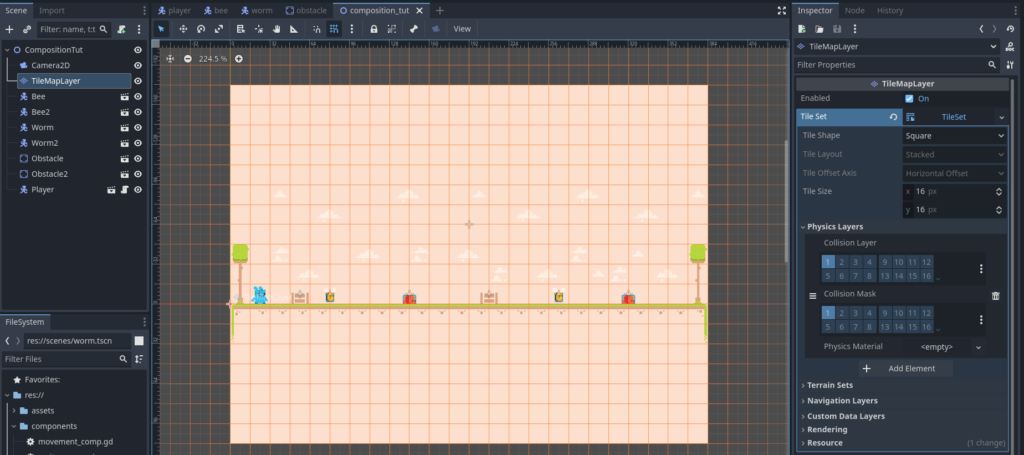
And if you run the scene, the whole project should play out like this (move with arrow, jump with space):
Conclusion
Composition in Godot 4 is a powerful way to build complex, modular, and reusable game objects. By mastering it, you can create well-organized, flexible game projects that are easier to maintain and expand.
This tutorial covered the essentials of composition in Godot 4, providing you with a foundation to explore more advanced concepts and techniques. Whether you’re building a simple 2D game or a complex 3D world, the principles of composition will help you structure your game effectively. Happy game developing!
Download the source files
If already subscribed, you can find all project files here. Otherwise, you can subscribe to the mailing list to get access to this and other project files for free and get notified, when a new tutorial is posted.

