Localization in Godot 3
Localization is an important part of game development. If you are a small developer, it really is something to consider. Even though it is not easy and not cheap to get quality translations, sometimes it is really worth it. Localization in Godot 3 is easy to implement, and you should always structure your game with localization in mind.
But localization is a double-edged sword. For example, I worked on a mobile game with a target audience in Germany and Austria, but I also translated it into Spanish. And it turned out, that that game actually was quite popular in some countries in South America. If you get bad translations, on the other hand, sometimes it can be better to not translate the game at all: At some point, I did get a very poor French translation of my game. This resulted of course in bad reviews for the French version.
My advice: Go with your main language first, and if the game gets some support, then consider translating it. But if you decide to translate it, make sure you get good-quality translations.
Create localization in Godot 3
Localization in Godot is not difficult. You can implement different languages very easily. But keep in mind, that if you want to support languages with different letters like Russian, you have to make sure, that the font you use supports all needed letters.
Import translations
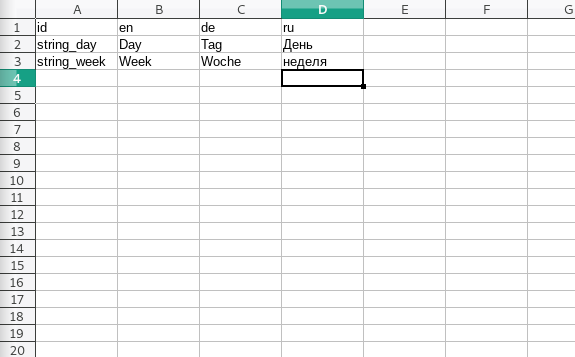
In order to use localization in Godot you have to import your translations. For that, you should make a spreadsheet with all the languages you want to support. Make a column with id, followed by the language you want to support (have a look at the screenshot).

Below that, you write your text in the desired language. Have a look here, if you don’t know a specific locale code.

Just save the file as a .csv file in your game folder (for example, into a folder called translation). Godot should automatically import the files (make sure to set the delimiter to “comma when saving to .csv format” and check, if the Import settings are also set to coma).
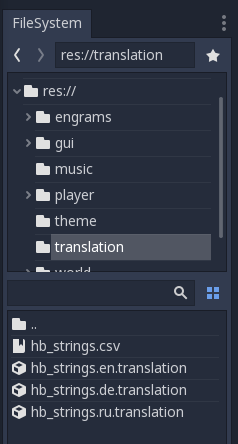
For every language, Godot should create a separate file with a .translation ending (check out the screenshot). Once the file is imported, you can change that file however you like. Just always save it as .csv and Godot will import all the changes.
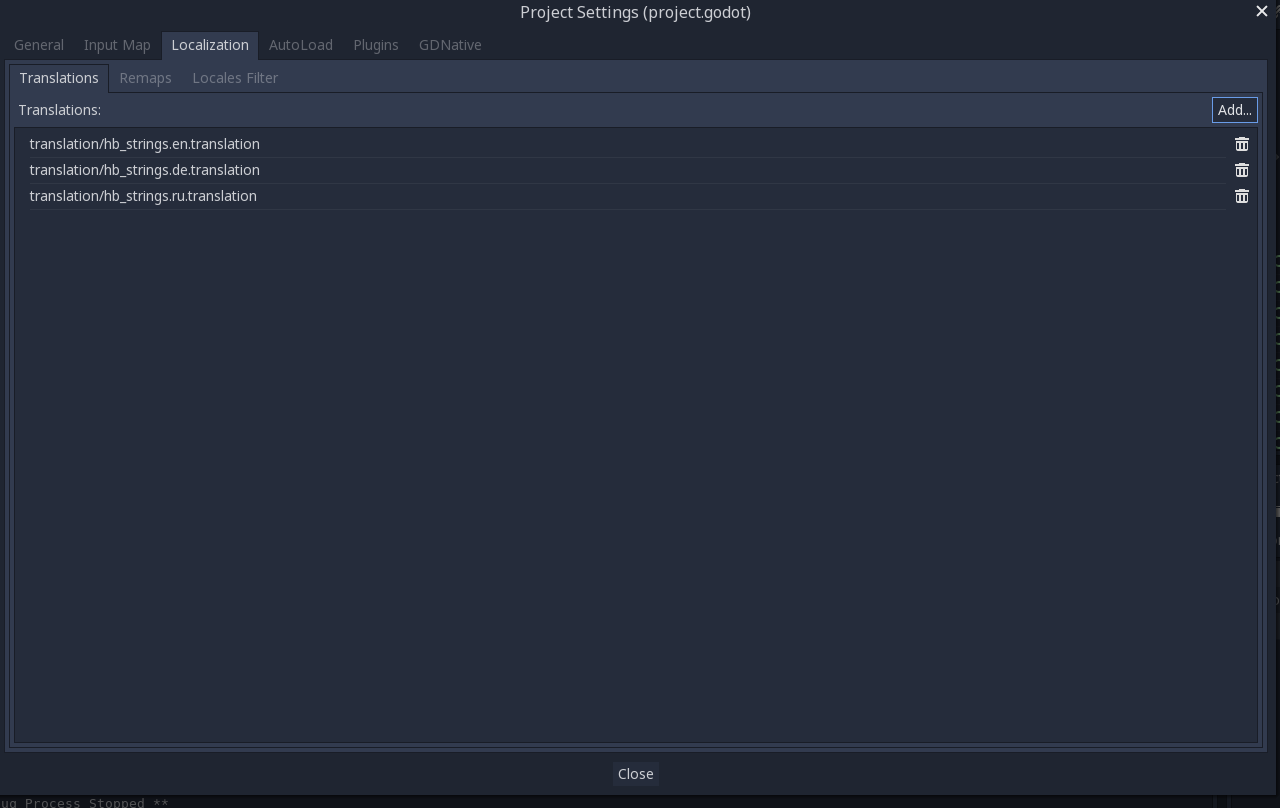
Then go to Project Settings and add all relevant translation files:

How to use localization in Godot 3
In order to use the text in your spreadsheet, you can call
tr("your_id")to get the wanted line of text. If you have a Label with the name myText for example, you can call
myText.set_text(tr("string_day"))Godot will then check the ID string_day in your spreadsheet and returns the right string.
Insert values into your texts
You can also use the usual format strings. So if you like to insert a value into your translated text, make sure to add %s to the text in your spreadsheet.

Then you can assign a value like this:
myText.set_text(tr("string_w_value") % str(3)))In this example, your label would show “I have 3 cats!”. Here you can find more info on format strings in GDScript if you like to learn more.

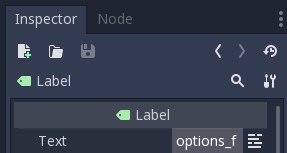
Another way is to just type in the text ID into the Node field itself. So if you have a key that is called options_f, you can just type that ID into the text field of the Label. It then searches the right line of text in your spreadsheet.
Change the language
To change the current language in runtime, you can use the TranslationServer. For example, to use the German translation, you can write the following into your _ready() function:
func _ready():
   TranslationServer.set_locale("de")
More Information:
As you can see, localization in Godot is useful and not too hard to implement. If you did find this post useful, let me know. You may also be interested in inputs in Godot, which I recently updated. For even more information or other interesting topics, check out the overview or the following links:


